Article
ATastyBellPepper
03-28

The secret life of soil is a thriving and complex world that is often overlooked but is vital to the health and vitality of your plants. It exists beneath the surface of your garden. A dynamic ecosystem full of life, nutrients, and interdependent processes, soil is more than just a passive medium for plants. This article will explore the properties of soil and how to improve it to grow a healthy garden, opening our eyes to the world hidden beneath the surface.
The Soil Microbiome: Unseen Guardians of Growth
Microorganisms
A vibrant community of microorganisms, including fungi, bacteria, and protozoa, toils away beneath the soil's surface to keep it healthy. In the breakdown of organic matter, nutrient cycling, and establishment of a symbiotic relationship with plant roots, these microscopic soil stewards are essential.
Mycorrhizal Fungi
To increase plant roots' reach and improve nutrient absorption, mycorrhizal fungi collaborate with them to form a unique partnership. This subterranean partnership benefits the plants as well as the soil's overall structure and ability to hold onto water.
Soil Structure: The Foundation of Healthy Growth
Understanding Soil Textures
There are different textures of soil, such as clayey, loamy, and sandy. Every texture is different and affects drainage, aeration, and water retention differently. To optimize the structure of your soil for plant growth, you must first understand its texture.
Building a Loamy Haven
A garden's ideal foundation is thought to be loamy soil, which is a well-balanced mixture of sand, silt, and clay. It offers ideal drainage, water retention, and nutrient availability. Add organic materials to your soil, such as compost, well-rotted manure, or cover crops, to improve its structure.
Nutrient-Rich Soil: Feeding the Garden's Appetite
The Role of Soil Nutrients
A wide range of nutrients are needed by plants for healthy growth, including micronutrients like iron and zinc and important macronutrients like nitrogen, phosphorus, and potassium. Knowing your soil's nutrient profile is essential to giving your plants the proper balance.
Composting Magic
Kitchen scraps, yard waste, and organic matter can all be magically transformed into nutrient-rich humus through the process of composting. Composting is a great way to recycle organic waste and improve the fertility and structure of your soil by adding a lot of nutrients.
pH Levels: Striking the Right Balance
The pH Dance
The acidity or alkalinity of the soil, or pH, has a significant impact on the nutrients that plants can access. The pH range of slightly acidic to neutral is preferred by most plants. You can make sure that your plants can get the nutrients they need for healthy growth by testing the pH of your soil and making necessary amendments.
Lime and Sulphur
Gardeners use sulfur to lower pH in alkaline soils and lime to raise pH in acidic soils. These amendments are essential for preserving the delicate equilibrium between acidity and alkalinity and establishing a setting that is healthy for plants.
Water-Wise Soil Management: Retaining Moisture and Aeration
Mulching Mastery
Mulching is a gardening superhero that controls soil temperature, inhibits weed growth, and retains soil moisture. Not only do organic mulches like compost, wood chips, or straws improve the visual appeal of your garden, but they also improve the general health of the soil.
Aeration for Root Breath
Compacted soil impedes the flow of oxygen and limits the growth of roots. Frequent aeration, which can be attained by tilling the soil or using aerating tools, keeps the soil from becoming compacted, allowing roots to breathe and encouraging the flow of nutrients and water.
Soil Conservation: Preserving the Garden's Foundation
Erosion Control Strategies
A silent threat to the foundation of your garden is soil erosion. Use techniques to prevent erosion, such as retaining walls, terraced beds, and ground cover planting, to protect your soil from the eroding effects of wind and water.
Rainwater Harvesting
Rainwater collection benefits your soil health in addition to water conservation. Rainwater offers your garden a healthy and natural source of hydration because it is pure and devoid of salts and chlorine.
Conclusion
The secret life of soil is a vibrant and hidden world beneath our feet, and as gardeners, we are stewards of more than just plants. We can fully realize the potential of our gardens by comprehending and preserving this ecosystem. Everything that affects the health and vitality of the soil, from tiny microorganisms to nutrient-rich compost, from pH adjustments to aeration techniques, is involved.
Improving the base of your garden is an exploration where intuition and science collide with creativity and stewardship. Dig a little bit deeper, observe the world that is hidden from view, and create a garden where your plants grow and the soil is rich.
0
0
Article
ATastyBellPepper
01-20
Introduction:
Preparing your garden for the winter season is essential to ensure that your plants, soil, and garden structures are protected from the harsh weather conditions. By taking the necessary steps to winterize your garden, you can set a solid foundation for a vibrant and thriving garden when spring arrives. In this article, we will explore some key tasks and tips for winterizing your garden to ensure a successful transition into the spring season.
Clean Up and Clear Out:
Start by cleaning up your garden and removing any debris, fallen leaves, or dead plants. These can serve as hiding places for pests and diseases during the winter months. Clearing out the garden beds and removing weeds will prevent them from taking over your garden in spring. Dispose of any diseased or infested plant material to avoid spreading problems to healthy plants.
Expanding on this point, consider pruning your trees, shrubs, and perennial plants as part of your cleanup process. Remove any dead or damaged branches to promote healthy growth and prevent potential hazards during winter storms. Make sure to research the specific pruning requirements for each plant, as some may benefit from late winter or early spring pruning.
Protect Your Plants:
Protecting your plants from freezing temperatures and harsh weather conditions is crucial for their survival during winter. Consider using mulch to insulate the soil and protect plant roots from extreme temperatures. Apply a layer of organic mulch, such as straw or shredded leaves, around the base of plants to help retain moisture and regulate soil temperatures.
Expanding on this point, certain plants may require additional protection, especially those that are more sensitive to cold temperatures. Consider covering them with burlap, frost blankets, or specialized plant covers to shield them from freezing temperatures and drying winds. This is particularly important for delicate perennials, young trees, and shrubs.
Prepare Your Soil:
Preparing your soil before winter sets in is essential to ensure healthy plant growth in the spring. Consider adding organic matter, such as compost or well-rotted manure, to enrich the soil and improve its structure. This will provide essential nutrients for plants and enhance drainage, preventing waterlogging during winter rains.
Expanding on this point, consider conducting a soil test to determine its pH level and nutrient content. This will help you identify any deficiencies and adjust the soil accordingly. Most plants prefer a slightly acidic to neutral pH level, so amendments like lime or sulfur may be necessary to achieve the optimal pH range.
Maintain Your Garden Structures:
Winter can be rough on garden structures such as fences, trellises, and supports. Take the time to inspect and repair any damaged or weakened structures before they worsen during the winter storms. Reinforce or replace loose posts, repair broken slats, and ensure that all supports are securely in place.
Expanding on this point, consider protecting delicate garden structures, such as arbors or decorative elements, by wrapping them in burlap or covering them with tarps. This will prevent damage caused by heavy snow, ice, or strong winds.
Plan for Spring:
While winterizing your garden, take the opportunity to plan for the upcoming spring season. Research and select new plants, order seeds, and create a planting schedule. Consider any changes or improvements you want to make to your garden layout or design. Planning ahead will ensure that you are ready to hit the ground running as soon as the weather warms up.
Expanding on this point, consider starting seeds indoors or in a greenhouse if you want to get a head start on your spring planting. This will give you a jumpstart on growing seedlings that can be transplanted into your garden once the frost danger has passed.
Protect Your Containers and Pots:
If you have garden containers and pots, it's important to protect them during the winter months. Freezing temperatures can cause pots to crack or break. To prevent this, move your containers to a sheltered area, such as a covered porch or garage. Alternatively, you can wrap them in bubble wrap or burlap to provide insulation. Elevate the pots off the ground using bricks or pot feet to allow for proper drainage and prevent waterlogging.
Maintain Your Garden Tools:
Winter is an ideal time to clean and maintain your garden tools. Properly cleaning and storing your tools will help extend their lifespan and ensure they are in good working condition when spring arrives. Remove any dirt or debris from the tools, sharpen blades if necessary, and apply a light coat of oil to prevent rust. Store them in a dry and protected area, such as a shed or garage, to avoid exposure to moisture and harsh weather conditions.
Provide Food and Water for Wildlife:
During the winter months, many animals struggle to find food and water sources. You can support local wildlife by providing supplemental food and water in your garden. Consider installing bird feeders and providing birdseed, suet, or nectar for birds. You can also leave out water sources, such as shallow dishes with fresh water, for birds and other animals to drink from. Creating a wildlife-friendly garden not only benefits the local ecosystem but also adds beauty and interest to your outdoor space.
Conclusion:
Winterizing your garden involves various tasks to protect and prepare your plants, soil, garden structures, and containers for the harsh winter months. By cleaning up, protecting plants and containers, preparing the soil, maintaining garden tools, and providing food and water for wildlife, you can ensure that your garden remains healthy and ready for a successful spring season. So, take the time to winterize your garden and enjoy the beauty and abundance it will bring in the coming months.
0
0
Article
ATastyBellPepper
01-08
Thoughtful cultivation nurtures bountiful harvests.
Choose Varieties for Your Conditions
Assess sunlight, soil quality and temperature fluctuations. Basil succeeds in 6+ hours direct sun and rich soil. Lemon balm tolerates partial shade. Cilantro bolts quickly in heat over 80°F, opting for slower bolting varieties. Garlic and ginger prefer cool areas while turmeric, galangal thrive in tropical heat and humidity. Dwarf plant varieties fit compact spaces better than standard sizes. Research each herb’s ideal growing conditions.
Prepare Optimal Growing Beds
Layout raised beds, aboveground planter boxes or in-ground garden plots. Beds allow for improved drainage. Dig and amend soil with 2-3 inches of compost or well-aged manure along with lime if soil tests acidic. Work amendments thoroughly into soil’s top 6-12 inches. Position beds in locations receiving full sun for at least 6 hours daily if possible. For shaded spots, supplement with LED grow lights hung 2-3 feet overhead and operated 12-16 hours per day. Lay down landscape fabric, straw mulch or build physical edging to suppress weeds from thriving around plants.
Start from Seedlings or Seed
Purchase nursery transplants when seasons allow for jumpstarted harvests. Start seeds indoors 6-8 weeks prior in seed starting mix under grow lights. Hardening off seedlings gradually acclimates them to sun and breeze before transplanting after last spring frost when soil reaches 60°F. Plant seeds directly in ground when soil reaches at least 60°F, thinning as baby plants develop. Provide climbing structures for vining crops like pole beans, tomatoes and cucumbers.
Water Consistently Yet Thoroughly
Check soil moisture daily, watering deeply whenever top 1-2 inches start to dry out. Water seedlings more regularly versus established plants. Deploy soaker hoses beneath mulch or use drip irrigation tape next to individual plants for targeted, efficient delivery. Water consistently in morning to allow foliage time to dry out before nightfall.
Fertilize Monthly Through Growth
Once plants reach 4-6 inches tall, side dress with balanced 5-10-5 fertilizer, working it lightly into top few inches of soil. Supplement trace minerals by brewing weekly compost or manure tea to boost production organically. Fertilize after major trimmings or each productive season.
Prune for Continuous Harvests
Pinch back leggy growth or remove spent foliage regularly. Harvest whole basil stems or sprigs of other herbs often to encourage regrowth. Cut back spent plants in fall after 1st frost to tidy beds for winter. Protect more tender perennials with mulch.
Monitor for Pests or Disease
Inspect plants daily, removing diseased foliage or pest sightings promptly before spreading. Spray neem oil, insecticidal soap or compost tea regularly as preventative or at first signs of issues like aphids or powdery mildew organically if possible. Protect seedlings with row cover fabric from pests.
Extend the Harvest Season
Before fall frost, move pots indoors under lights or near sunny windows. Hang herb bundles to air dry for use year-round. Freeze or can pesto, herbs in oil for delicious culinary gifts and meals later.
Conclusion
With attentive care tailored to plant preferences, homegrown herbs and spices provide flavorful, healthy ingredients for creating memorable meals and culinary satisfaction.
0
0
Article
ATastyBellPepper
2023-12-31
Composting and fertilizing are essential practices for maintaining healthy plants and promoting sustainable gardening. They provide plants with essential nutrients, improve soil quality, and reduce waste by recycling organic materials. Whether you have a small garden or a large plot, here are some tips and information to help you compost effectively and fertilize your plants for optimal growth:
Composting:
1. Choose a composting method: There are several composting methods to choose from, including traditional backyard composting, vermicomposting (using worms), or using compost tumblers or bins. Select a method that suits your space, time, and preferences.
2. Collect compostable materials: Gather a mix of "green" and "brown" materials. Green materials are nitrogen-rich and include fruit and vegetable scraps, coffee grounds, grass clippings, and fresh plant trimmings. Brown materials are carbon-rich and include dry leaves, shredded newspaper, straw, and wood chips. Avoid meat, dairy products, and oily foods as they may attract pests.
3. Balance the compost: Aim for a balanced ratio of roughly 3 parts brown materials to 1 part green materials. This helps create an optimal environment for decomposition and prevents the compost from becoming too wet or too dry.
4. Chop or shred larger materials: Breaking down larger materials into smaller pieces accelerates the decomposition process. Use a shredder, lawnmower, or pruning shears to chop or shred items like branches, stalks, or larger leaves.
5. Layer and moisten: Layer the compostable materials, alternating between green and brown, to ensure good airflow. Moisten the pile as you go to maintain a moist but not soggy environment. Aim for a consistency similar to a damp sponge.
6. Aerate and turn: Regularly turn the compost pile every few weeks using a garden fork or compost aerator. This introduces oxygen and helps even out the decomposition process. Turning also prevents odors and accelerates the breakdown of materials.
7. Patience and monitoring: Composting takes time, typically several months to a year, depending on the materials and conditions. Monitor the compost pile's moisture level and temperature. If it's too dry, add water; if it's too wet, mix in dry materials. The compost is ready when it becomes dark, crumbly, and earthy-smelling.
8. Use the compost: Once the compost is ready, use it to enrich your garden soil. Spread it as a top dressing around plants, mix it into potting mixes, or create compost tea by steeping compost in water for a nutrient-rich liquid fertilizer.
Fertilizing:
1. Understand plant nutrient needs: Different plants have varying nutrient requirements. Learn about the specific needs of the plants in your garden, including their preferences for nitrogen (N), phosphorus (P), and potassium (K), commonly represented as NPK ratios on fertilizer labels.
2. Soil testing: Conduct a soil test to determine your soil's nutrient levels and pH. This helps you identify any deficiencies or imbalances that need to be addressed. Soil testing kits are available at garden centers, or you can send a sample to a lab for more detailed analysis.
3. Choose the right fertilizer: Select a fertilizer that matches your plants' needs and the results of your soil test. Fertilizers come in various forms, such as granular, liquid, or slow-release. Organic options, like compost or well-rotted manure, provide a slow-release and sustainable source of nutrients.
4. Follow application instructions: Read and follow the fertilizer's instructions carefully. Apply the recommended amount evenly around the plant's root zone, avoiding direct contact with the leaves or stems. Over-fertilizing can harm plants, so it's important to apply the right amount.
5. Timing and frequency: Fertilize plants during their active growth periods, typically in the spring and early summer. Follow a regular fertilization schedule but avoid excessive or unnecessary applications. Some plants, like vegetables or annual flowers, benefit from additional feedings throughout the growing season.
6. Watering after fertilizing: Water the plants thoroughly after applying fertilizer. This helps dissolve and distribute the nutrients into the soil, making them accessible to the plants' roots.
7. Organic alternatives: Consider using organic fertilizers or natural amendments like compost, manure, bone meal, or seaweed extracts. These options provide a slow-release of nutrients and improve soil structure and microbial activity.
8. Mulching: Apply a layer of organic mulch, such as wood chips or straw, around plants to conserve moisture, suppress weeds, and gradually release nutrients into the soil as the mulch breaks down.
Remember, moderation is key when fertilizing plants. Over-fertilization can harm plants, leach nutrients into groundwater, and negatively impact the environment. It's always best to start with a soil test and follow recommended application rates for the specific plants you're growing.
By composting effectively and fertilizing appropriately, you can create nutrient-rich soil and promote the healthy growth of your plants. These practices not only benefit your garden but also contribute to a more sustainable and environmentally friendly approach to gardening. Enjoy the process of recycling organic materials and nurturing your plants with natural and nutrient-dense amendments.
0
0
Article
ATastyBellPepper
2023-12-27
Introduction
Organic gardening techniques focus on cultivating plants and maintaining soil health without the use of synthetic fertilizers, pesticides, or genetically modified organisms. It promotes sustainable and environmentally-friendly practices that support the overall ecosystem. Here are some essential techniques for organic gardening:
Soil Preparation
Soil preparation is a fundamental aspect of organic gardening. Begin by testing your soil to assess its pH level and nutrient content. This information will guide your decisions regarding soil amendments. Incorporating organic matter, such as compost, well-rotted manure, or leaf mold, enhances soil structure and fertility. It improves water retention, drainage, and nutrient availability, promoting healthy plant growth.
Crop Rotation
Crop rotation is a vital practice in organic gardening. By rotating the types or families of plants in each bed or area annually, you can prevent the accumulation of pests and diseases specific to particular plants. Additionally, rotating crops ensures a balanced nutrient uptake. For example, following plants with high nutrient demands with nitrogen-fixing legumes replenishes the soil.
Companion Planting
Companion planting is an effective technique for maximizing the health and productivity of your garden. Certain plant combinations can repel pests, attract beneficial insects, enhance pollination, and improve nutrient uptake. For instance, marigolds planted near tomatoes deter nematodes, while basil grown near peppers repels aphids.
Natural Pest Control
Encouraging natural pest control methods is essential in organic gardening. Attracting beneficial insects, birds, and predators to your garden helps maintain a balanced ecosystem. Planting flowers that attract pollinators and provide habitat for beneficial insects, such as ladybugs and lacewings, encourages their presence. Using physical barriers like row covers, netting, or fences can also protect plants from pests. Consider handpicking pests when feasible and using organic pest control products as a last resort.
Water Conservation
Water conservation is a key practice in organic gardening. To minimize water usage and maintain proper soil moisture levels, employ techniques such as mulching. Applying mulch, such as straw or wood chips, around plants suppresses weeds, retains moisture, and regulates soil temperature. Installing drip irrigation systems or using soaker hoses allows water to be delivered directly to plant roots, minimizing evaporation.
Organic Fertilization
Organic fertilization is crucial in providing necessary nutrients to plants. Utilize organic fertilizers, such as compost, well-rotted manure, or plant-based fertilizers, to supplement soil fertility. Apply these fertilizers in moderation, based on the specific nutrient requirements of your plants. Over-fertilization can lead to imbalances and environmental pollution.
Weed Control
Managing weeds is an ongoing task in organic gardening. Employ methods such as mulching, hand weeding, or mechanical weeders to control weed growth. Regularly removing weeds helps prevent competition for nutrients, water, and sunlight. Avoid using synthetic herbicides, as they can harm beneficial organisms and contaminate the soil and water.
Conservation of Resources
Conserving resources is essential for sustainable organic gardening. Practice water and energy efficiency in your garden by collecting rainwater in barrels for irrigation. Utilize energy-efficient tools and equipment. Additionally, recycle garden waste through composting, reducing the need for outside inputs.
Remember, organic gardening is a continual learning process. Stay informed about organic gardening principles and techniques specific to your region or climate. Experiment, observe, and adapt your practices to create a thriving and sustainable organic garden.
0
0
Article
ATastyBellPepper
2023-11-08
Soil: The Lifeblood of the Garden
Soil is much more than mere dirt—it's a complex ecosystem vital for plant health. A healthy garden begins with rich, nourishing soil that supports a diversity of microorganisms and nutrients. Understanding its composition, pH levels, and texture lays the groundwork for a vibrant, productive garden.
Comprehending Soil Composition
Soil composition is a delicate balance of minerals, organic matter, air, and moisture. The ideal garden soil, often referred to as loam, is a blend that contains equal parts of sand, silt, and clay, offering an optimal environment for plant roots: it retains moisture yet drains well.
The Significance of pH Levels
The pH level of soil determines its acidity or alkalinity, which can significantly affect plant growth. Most plants thrive in soil that is slightly acidic to neutral (pH 6.0-7.0). Testing soil pH is crucial since extreme levels can hinder plants' ability to absorb nutrients, no matter how fertile the soil may be.
Organic Matter: The Crux of Soil Fertility
Organic matter, such as decomposed leaves, grass clippings, or compost, is the cornerstone of fertile soil. It enhances soil structure, nourishes soil life, and improves nutrient content and moisture retention. Regularly amending garden soil with organic matter can invigorate plant growth and health.
Microbial Universe: The Unseen Soil Inhabitants
A teaspoon of soil is home to billions of microorganisms—bacteria, fungi, protozoa, and nematodes—that play a critical role in decomposing organic matter, fixing nitrogen, and maintaining soil health. These microorganisms are the unsung heroes that help create a self-sustaining soil ecosystem.
Cultivating Soil Structure
Good soil structure is essential for root growth, water infiltration, and air movement. Practices like minimizing soil compaction and avoiding working the soil when it's too wet are important. Regularly incorporating organic matter can also improve structure, creating an environment where roots can spread out and microbes can thrive.
Water Management and Soil Health
Proper water management is paramount in maintaining soil health. Overwatering can lead to soil erosion and nutrient leaching, while underwatering can stress plants and reduce microbial activity. Mulching can help conserve soil moisture and regulate temperature, promoting a more resilient garden bed.
Soil Conservation and Sustainable Practices
Preventing soil degradation is vital for long-term garden health. Sustainable practices such as crop rotation, cover cropping, and reduced tillage can prevent soil erosion, build organic matter, and enhance biodiversity. These practices ensure that the soil remains healthy and productive year after year.
Feeding the Soil, Not Just the Plants
A shift in perspective from feeding plants to feeding the soil can lead to a healthier garden. By focusing on creating rich, living soil, gardeners can produce robust plants that are better equipped to resist pests and diseases.
Conclusion: The Groundwork of Gardening
The symphony of soil is a dynamic, ongoing process that plays out beneath our feet. By understanding and nurturing the foundations of soil health, gardeners can orchestrate a garden that is not only beautiful and productive but also a haven for the intricate web of life that sustains it.
0
0
Article
atastybellpepper
2022-07-21

You may make decisions about what has to be done to make your soil suitable for the plants you wish to grow by learning as much as you can about it. You may prevent the disappointing outcomes that can happen when your soil is improper for your ideal garden if you can learn about the texture, composition, drainage, acidity, and mineral density of your soil.
Take a handful of damp, but not wet, soil from your garden, and give it a good squeeze to assess the sort of soil you have. Open your hand now. Any one of the following will occur:
1. It will maintain its form, but if you lightly poke it, it will collapse. You are fortunate to have rich loam, so!
2. It will maintain its form and clings obstinately to your hand when prodded. You have clay soil, then.
3. As soon as you open your palm, it will crumble. You have sandy soil, thus this indicates.
You may try to improve your soil now that you are aware of the kind you have.
1. Make a hole that is a foot deep and six inches broad.
2. Water should entirely drain after being poured into the hole.
3. Once again, fill it with water.
4. Note the length of time it takes for the water to drain.
You have poor drainage if it takes the water more than four hours to drain.

1. Check to see whether the soil has reached a temperature of at least 55 degrees and is at least moderately damp, but not drenched.
2. Create a hole that is one foot wide and one foot deep. Put the dirt on a piece of cardboard or a sheet.
3. As you re-fill the hole with dirt, sift it with your hands and count the earthworms as you go.
Your soil is in excellent condition if you detect at least 10 worms. Less than that might mean that your soil is either too acidic or alkaline, or that there isn't enough organic matter to maintain a robust worm population.
pH test kits are available at any garden and home store. These kits are quite accurate, but you must carefully adhere to the testing guidelines. You may start trying to fix the issue after you determine if the pH of your soil is a problem or not.
The next step is to get in touch with your local cooperative extension office if you discover that after doing all of these tests and amending the soil as necessary to address the problems, your plants are still having a hard time. They'll explain how to get a soil sample and submit it to their lab for examination. They will provide a report with recommendations on how to address any mineral shortages in your soil.
These tests are easy and affordable methods to make sure your garden has the finest possible foundation.
Test One: Squeeze Test
The composition of soil is one of its most fundamental properties. Soils are often categorized as clay, sandy, or loamy soils. Although rich in nutrients, clay drains slowly. Sand drains quickly but has a hard time holding onto moisture and nutrients. Because it holds onto moisture and nutrients without becoming permanently wet, loam is often regarded as the optimum soil type.Take a handful of damp, but not wet, soil from your garden, and give it a good squeeze to assess the sort of soil you have. Open your hand now. Any one of the following will occur:
1. It will maintain its form, but if you lightly poke it, it will collapse. You are fortunate to have rich loam, so!
2. It will maintain its form and clings obstinately to your hand when prodded. You have clay soil, then.
3. As soon as you open your palm, it will crumble. You have sandy soil, thus this indicates.
You may try to improve your soil now that you are aware of the kind you have.
Test Two: The Percolation Test in Soil
Identifying whether or not you have drainage issues is also crucial. If their roots remain too damp, certain plants, including several culinary herbs, may ultimately perish. Test the drainage of your soil here:1. Make a hole that is a foot deep and six inches broad.
2. Water should entirely drain after being poured into the hole.
3. Once again, fill it with water.
4. Note the length of time it takes for the water to drain.
You have poor drainage if it takes the water more than four hours to drain.
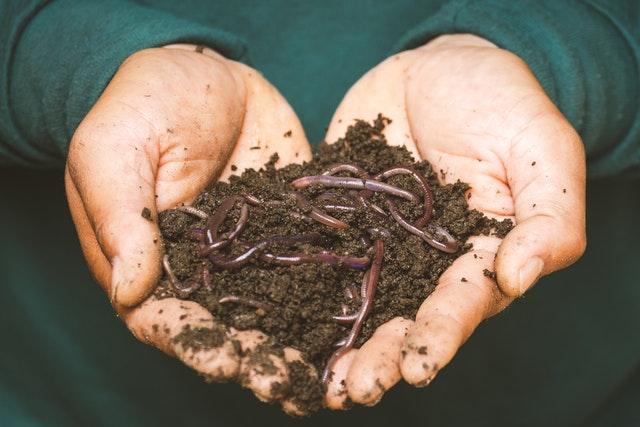
Test Three: The Worm Test in Soil Testing
Worms are excellent indicators of the biological activity and general health of your soil. The likelihood is that if you have earthworms, you also have all of the helpful bacteria that promote healthy soil and robust plants. Making the worm test:1. Check to see whether the soil has reached a temperature of at least 55 degrees and is at least moderately damp, but not drenched.
2. Create a hole that is one foot wide and one foot deep. Put the dirt on a piece of cardboard or a sheet.
3. As you re-fill the hole with dirt, sift it with your hands and count the earthworms as you go.
Your soil is in excellent condition if you detect at least 10 worms. Less than that might mean that your soil is either too acidic or alkaline, or that there isn't enough organic matter to maintain a robust worm population.
Test Four: Soil's pH Test
Your soil's pH (acidity level) has a significant impact on how effectively your plants develop. The pH scale ranges from 0 to 14, with 0 being very acidic and 14 being extremely alkaline. Most plants thrive in soil that has a pH between six and seven, which is quite neutral. Plants just won't grow as well as they should if the pH is more than eight or less than five.pH test kits are available at any garden and home store. These kits are quite accurate, but you must carefully adhere to the testing guidelines. You may start trying to fix the issue after you determine if the pH of your soil is a problem or not.
The next step is to get in touch with your local cooperative extension office if you discover that after doing all of these tests and amending the soil as necessary to address the problems, your plants are still having a hard time. They'll explain how to get a soil sample and submit it to their lab for examination. They will provide a report with recommendations on how to address any mineral shortages in your soil.
These tests are easy and affordable methods to make sure your garden has the finest possible foundation.
0
0
Article
atastybellpepper
2022-07-04
New orchid growers quickly learn that good orchids cannot thrive in ordinary potting soil. Most orchids really grow in the air; the medium is only there to provide the roots with something to adhere to since it is too thick and doesn't drain well enough. In addition, the variety of orchid potting material options might be perplexing.
Many orchid cultivars may thrive in a medium with only one element, while others only like certain materials. You may create your own unique orchid mix, but you must first learn about the requirements of your specific plant. Additionally, depending on the medium used, a wide range of high-quality orchid growth mixtures are available that provide various advantages.
Cost, availability, and appearance may enable you to make a more specific decision among all of these possibilities. It's wise to educate yourself on the characteristics of each kind of material to aid in your decision.
Brick pieces and paving stones
Brick fragments provide hefty orchid pots weight and stability. However, since it may be so hefty, you should go for lesser sized pieces. Because of this material's moderate water retention, the humidity around your orchids will be higher.
The bottom half of an orchid pot may also be secured with cobblestones as an anchor. Top-heavy orchids like dendrobiums can stand erect because the little, irregular pebbles are weighty. Since cobblestone won't hold onto water, you'll need assistance improving the drainage capabilities of your orchid mix.
Coconut Husk Chips with Coir
The fibrous central core that surrounds the fruit, known as coconut coir, may be used on its alone or as a component of a unique orchid combination. In order to provide orchid roots with wet but not soggy growth conditions, the long fibers collect moisture while also releasing it fast.
Coconut husk chips, a sustainable resource, are available in various sizes to suit your requirements, whether they be as a stand-alone growth media or an addition to potting soil. As a result of the chips' gradual decomposition, the roots of orchids get the most air possible. Plaques made of cocoa husk fiber, which provide a great substrate for growing orchids on mounts, are also used by many orchid gardeners.
Cork
The waterproof characteristics of cork are known to everyone who has a vintage bottle of wine. For the best orchid mix, combine water-shedding cork with water-absorbing sphagnum moss or finely chopped bark. The bigger cork chips have a lot of nooks and crannies that orchid roots may explore.
Aggregate of Expanded Clay
Some orchids are sold with potting soil that contains pebbles that resemble Cocoa Puffs cereal. If you see them, it's highly probable that the plant you bought was grown in a clay aggregate that has been extended, such as Aliflor or Hydroton Clay Pebbles.
These ceramic pebbles differ from conventional rocks in that they are porous, light, and neither acidic nor alkaline. To give the pots of your orchids a consistent look, you may use them as a mulch on all of them, combine them with other growth medium, or use them alone.
Rock of Lava
This inorganic growth media is often used with orchids brought in from Hawaii. Lava rock is an useful potting mix addition for orchids that don't want to have their roots disturbed since, like other rock growth medium, it won't decompose. Lava rock holds onto water, which raises the humidity level for your orchids.
Perlite
Perlite, commonly referred to as sponge rock, is made when volcanic glass is heated to a high temperature. Perlite provides great water retention and aeration qualities while without providing any nutrients to orchid plants. Due to the fact that most nurseries and garden stores have it on hand as a general soil supplement, it is also a fairly simple media to locate.
Pumice
Pumice The granite is very porous and may store as much water as 50% of its weight. Additionally, because of its modest weight, your plant won't be burdened by it.
Stone Wool
The cotton-like chalk and basalt fibers known as rock wool, sometimes written rockwool, may be purchased online or at higher-end gardening supply shops. Its major benefit is that it won't degrade in your orchid potting mix. However, you will need to add some organic material, such as bark or peat moss, to balance the alkalinity of the rock wool cubes.
Peeled bark
cypress, cedar, and fir tree bark that has been shredded. It is one of the most often used materials in orchid pots, particularly those that are offered to novices at flower stores and nurseries.
As the bark decomposes, it will acidify your orchid mix. It is also liked for its organic appearance and lovely scent. But once a year repotting may be necessary for orchids grown in a bark media.
Sphagnum moss Sphagnum moss, which is weed- and pathogen-free, keeps the soil around your orchid roots wet. However, it won't become soggy, which is why it's a popular option. For the greatest results, you should rehydrate the moss (which is sometimes supplied in compacted bricks) and place it loosely into the orchid planter.
Growing Styrofoam Orchids in a medium made of Styrofoam may be successful if they like dry times. Simple Styrofoam peanuts may function as a growth medium and are an environmentally good choice since they allow you to recycle the usual packaging material. Additionally, you may purchase specialized Styrofoam pellets like Aerolite that are created especially for epiphytic plants like orchids.
Vermiculite
Several potting soil additions are sold at garden centers, and vermiculite is often among them. It often appears as gravel-sized particles in many pre-made potting soil mixtures.
This pale brown mineral is effective in retaining nutrients and water. Additionally, vermiculite aids in aerating potting soil. Sphagnum moss and it work well together to make a light, moisture-retentive orchid mix.
0
0
Article
atastybellpepper
2022-06-29
The significance of fertilizing indoor plants is one that far too many people ignore. To develop healthy, attractive plants, correct feedings are necessary. The quantity of soil in the container and any additional food you give a houseplant are the only sources of nutrients it can access, unlike an outside garden where nature supplies rain and plants may shoot new roots out in search of nourishment.
Consider fertilizer as your potting soil's second half. Your plants won't require much, if any, fertilizer while the potting soil is new. This is particularly true of contemporary potting soils that have been strengthened with additives like fertilizer. But after around two months, the plant will have used all the soil's nutrients, so you'll need to fertilize if you want it to keep growing healthily.
Different Fertilizers
There are many various types of fertilizers, including liquids, sticks, pills, granules, and slow-release formulations. Liquid and slow-release fertilizers are the two that are most appropriate for indoor application. Granules and sticks may be more handy, but they don't do a good job of distributing nutrients throughout the soil, and after you've put a fertilizer stick into your pot, you have no control over how much of it will be released. Granular fertilizers are intended to be used outside.
Implement liquid fertilizer
Using a watering can, liquid fertilizers are administered after being diluted in water. You could fertilize every time you water or every other time, depending on the label's directions. The frequency will also depend on the kind of plant, since some—especially those with showy huge blooms—might need to be fed more often. Always do your study on the nutritional requirements of plants to understand what they need. You can carefully manage the amount of nutrients that are continuously supplied via liquid fertilizer. For instance, it is simple to stop feeding the plant during the winter months when it is dormant and to start feeding more when it begins to sprout new growth. The drawback is that you have to remember to do it each time.
Attempt slow-releasing fertilizer.
For both indoor and outdoor plants, these products have quickly emerged as many gardeners' and professional growers' favorites. The time-release shells on slow-release fertilizers are designed to slowly release nutrients into the soil. Because each pellet has a coating with a different thickness that dissolves at a different rate, the fertilizer is actually released gradually over time. Between four and nine months might pass between applications. The main disadvantage is that slow-release fertilizer is more expensive, but because it lasts so long, the cost is offset.
Utilize fertilizer granules.
You may manually incorporate dry, pure fertilizer pellets into the potting soil. They can be used for indoor containers, despite being more frequently used in outdoor gardens, though it can be challenging. Granular fertilizer is difficult to control because it releases all of its nutrients simultaneously when the pot is watered. Although fairly affordable, this kind of fertilizer is not a good option for feeding indoor plants.
Advice on Purchasing Fertilizer
The fundamental macronutrients that plants require to grow, such as nitrogen, phosphorus, and potassium, are present in all general-purpose fertilizers. Each macronutrient serves a certain purpose:
Nitrogen promotes the development of healthy foliage.
The element phosphorus promotes larger, healthier flowers.
Potassium promotes a robust internal system.
African violet fertilizers are one example of a specialty fertilizer that has these nutrients in optimized ratios for a specific plant type.
Better-quality fertilizers contain micronutrients like boron, magnesium, and manganese that will promote healthier growth in addition to these macronutrients. Check the fertilizer's label to see what nutrients are present.
0
0
Damnation: B
Growing
Linda's Garden
2020-07-19

Looks nice, healthy eyes have already grown out soil, can you see where we are?


0
0


Growing
Angela。
2020-06-15

The continuous rain might be too much for Aimee. Some branches in the center died and was cut away. So far no pests were seen and the soil felt somewhat dry to the touch before watering. The biggest buds dropped because of the rain. Aimee had some new shoots branching to the side, and new leaves ate growing


0
0
Growing
Angela。
2020-05-18
New growth from pruning done two weeks ago. It doesn’t look like buds. It rained the last two days and the soil is still moist, so it didn’t need to be watered.

0
0
Growing
Angela。
2020-05-18
New growth from pruning done two weeks ago. These new growths don’t look like buds. It rained the last two days and the soil is still moist, so it didn’t need to be watered.

0
0
Growing
Angela。
2020-05-16
It rained last night so i didn’t water Jubilation. this morning, I teimmed off these yellow buds (came like this when i bought it) and leaves that had yellow spots. I did some research and the probable cause could be the soil was not acidic enough. So i gave it a little fermented rice water after trimming, and dumped out excess water collected at the bottom of the pot immediately.
 and leaves that had yellow spots. I did some research and the probable cause could be the soil was not acidic enough. So i gave it a little fermented rice water after trimming, and dumped out excess water collected at the bottom of the pot immediately.")
 and leaves that had yellow spots. I did some research and the probable cause could be the soil was not acidic enough. So i gave it a little fermented rice water after trimming, and dumped out excess water collected at the bottom of the pot immediately.")
0
0